Potato and leek soup

Nourishing your body is essential for better health. Gut microbiome research is coming on leaps and bounds over the last few years.

The best ways to improve gut health is eating fermented foods (like the recipes I have shared in previous weeks) and increasing fiber diversity, aiming for at least 30 different sources each week. This is the kind of information I teach within The Healing Rebel Mastery programme which you can sign up for here>>> https://iamjenwilson.thrivecart.com/thehealingrebel/

30 sources sound a lot, but it’s not. Herbs, spices, nuts, seeds, grains, as well as fruit and vegetables all count. If you try and keep your veggies local and seasonal that will help the diversity and your health throughout the year. 

Salads are for spring/summer, root veggies are for autumn/winter. 

This week I am bring you a classic soup and showing you how you can easily boost the diversity and fiber points.

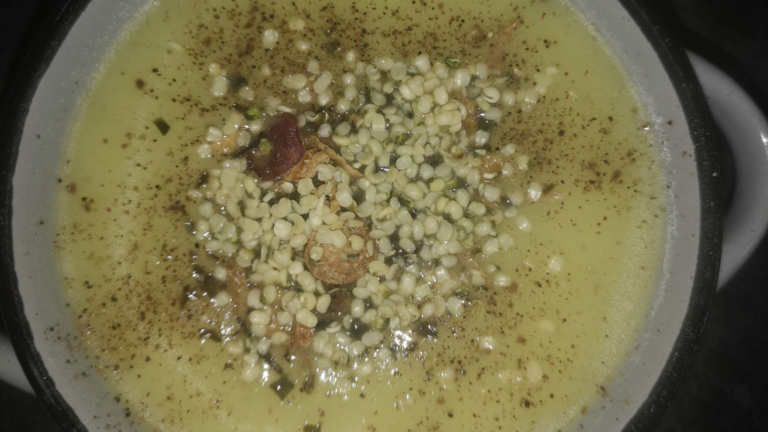
Potato & Leek Soup                                         Fibre Points 10+

2 medium/large leeks.

3 or 4 medium potatoes (if you use different varieties of potato that will increase your fiber points.

2 cloves of garlic (fermented garlic is even better)

Dried herbs: oregano, basil, coriander leaf, sage

2 bay leaves (remove these at the end the cooking process)

2 tablespoons extra virgin olive oil

3 heaped tspn bouillon or 3 stock cubes

Heat the oil, chop everything that needs to be chopped, put all the ingredients in the pot and sweat out the veggies to bring out the flavour. 

Once the veggies soften, add about 1.5 litres of boiling water. 

Bring to a boil then reduce to a simmer and leave to cook for around 45mins.

Remove the bay leaves then blend till smooth. 

When serving, adding some hemp seeds and black pepper gives you an additional couple of points. 

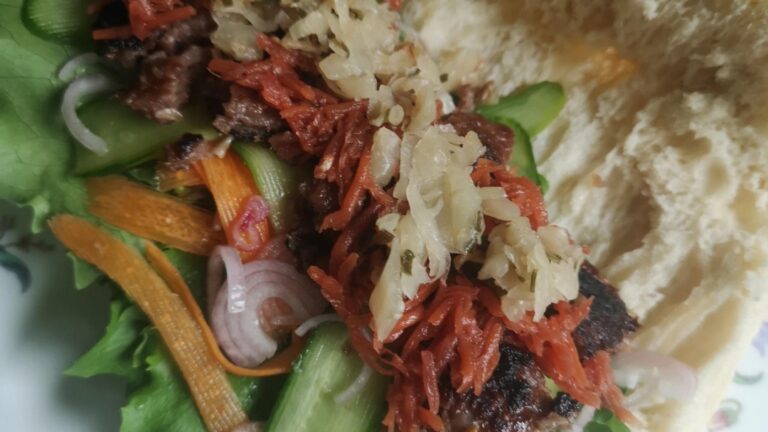
Having it with sourdough bread gives you even more fiber points! 

Let me know if you give it a go and if there are any tweaks you make. 

Low Sugar Blackberry Jam

Happy Saturday

I love jam, but so many shop-bought jams have SO MUCH SUGAR and often a whole load of other ingredients that personally… I don’t think jam needs… 

As I like to keep it simple, less ingredients the better.  

And, what’s even better, blackberries are abundant at the moment, which you can forage FOR FREE!! 

Blackberry Jam                                              Fibre Points 2

Use a ratio of 5:1 (berries to sugar) eg 500g berries, 100g sugar

Juice of a lemon (or lime)

You can either do this stovetop or in the slow cooker. 

On the stovetop: Mix everything in your pot over medium heat. The juice will release and once the sugar has dissolved, allow it to come to a boil, then reduce it to a simmer for 30 mins. Switch off the heat and leave to cool before transferring into sterilised jars for storage in the fridge.   

In Slow cooker: Mix everything in the pot, put of high for 3-4 hours string occasionally. Switch it off, leave to cool before transferring into sterilised jars. 

It tastes great on sourdough bread! 

Let me know if you make it and what you think.

Low Sugar Blackberry Jam

Happy Saturday

I love jam, but so many shop-bought jams have SO MUCH SUGAR and often a whole load of other ingredients that personally… I don’t think jam needs…

As I like to keep it simple, less ingredients the better.

And, what’s even better, blackberries are abundant at the moment, which you can forage FOR FREE!!

Blackberry Jam                                              Fibre Points 2

Use a ratio of 5:1 (berries to sugar) eg 500g berries, 100g sugar

Juice of a lemon (or lime)

You can either do this stovetop or in the slow cooker.

On the stovetop: Mix everything in your pot over medium heat. The juice will release and once the sugar has dissolved, allow it to come to a boil, then reduce it to a simmer for 30 mins. Switch off the heat and leave to cool before transferring into sterilised jars for storage in the fridge.

In Slow cooker: Mix everything in the pot, put of high for 3-4 hours string occasionally. Switch it off, leave to cool before transferring into sterilised jars.

It tastes great on sourdough bread!

Let me know if you make it and what you think.

What is kombucha?

Kombucha

Kombucha is a fermented tea drink that’s really good for your gut microbes. If you have been reading these emails or following me on social for a while, you know I am doing everything I can to support my gut health.  

It’s a healthy option for a refreshing ‘soft drink’. It supports the detoxification process. My friend Janice (who taught me this method, and the sourdough and fermented veggies) alternates alcoholic drinks with kombucha to minimise the damaging effects alcohol has on the body. 

You can buy shop-bought kombucha, I am yet to find one I like, I find they all taste the same, and not that nice. Plus, often though they are pasteurised (all the bacteria gets killed off) or they have added sugars, they are bottled in plastic (and I am really trying to cut down on plastic use) and they are expensive. Making your own is really cheap! And you get to experiment with different flavours. 

How to make Kombucha 

You will need a scobie (you can buy starter kits on Etsy or if you know someone who already makes their own, you can get a scobie and starter from them – I have loads I can happily pass on).

Once you have your scobie & starter kit get 2 x 500 ml jars, muslin cloth for each and an elastic band to secure.

Make up 1 litre of strong green tea – 2 tea bags and 80g of sugar (just regular granulated sugar, none of the fancy ones). You can use any tea as long as it has tannins in it – that’s what you need to make the fermented tea and the bacteria feed off the sugar so by the time you are drinking it, most of the sugar will be gone.

Once the tea has cooled to tepid, remove the tea bags.

Decant the tea into your 500 ml jars, scobie, and starter. If you have 1 scobie, cut it in half and split it between the 2 jars along with half the starter in each jar. The starter should be about 50ml in each jar.

Cover the jar with the muslin cloth and secure it (to keep the flies out and the oxygen getting in). Place the jars somewhere where they are not in direct sunlight or a draughty area. Ideally, somewhere that has a fairly consistent temperature.

Depending on the temperature in your home will determine how long your fermentation will take. In warmer temperatures, around 4 days, cooler temperatures 5-7 days. The best way to check is to taste test. If it’s still sweet, it needs more time. If it’s like vinegar, it’s gone too far. You are looking for a sweet spot between the 2 – everyone’s taste buds are different. It needs to be what you like.

Once you have the right taste, decant 80% of the liquid into a bottle. This is where you can have fun adding flavour to your kombucha. Personally, I decant 80% of each jar into 1 bottle. You can do that or have 2 separate bottles.

To flavour your kombucha you can use things like:

Ginger, elderflower, mint, seabuckthorn, hawthorn berries, rose petals, fruit (berries are really nice), any of your herbal tea bag flavours. You can get really inventive and try out seasonal things you can forage.

Add whatever you want to flavour, leave overnight, then you are good to start drinking from the following day.

Remember, I am collaborating with The Little Foragers Kitchen on Sunday 13th Aug 4-7pm with a Woodland Yoga & Forage, book here: https://bookme.name/iamjenwils…

What is Kombucha?

Kombucha

Kombucha is a fermented tea drink that’s really good for your gut microbes. If you have been reading these emails or following me on social for a while, you know I am doing everything I can to support my gut health.  

It’s a healthy option for a refreshing ‘soft drink’. It supports the detoxification process. My friend Janice (who taught me this method, and the sourdough and fermented veggies) alternates alcoholic drinks with kombucha to minimise the damaging effects alcohol has on the body. 

You can buy shop-bought kombucha, I am yet to find one I like, I find they all taste the same, and not that nice. Plus, often though they are pasteurised (all the bacteria gets killed off) or they have added sugars, they are bottled in plastic (and I am really trying to cut down on plastic use) and they are expensive. Making your own is really cheap! And you get to experiment with different flavours. 

To make Kombucha, you will need a scobie (you can buy starter kits on Etsy or if you know someone who already makes their own, you can get a scobie and starter from them – I have loads I can happily pass on).

Once you have your scobie & starter kit get 2 x 500 ml jars, muslin cloth for each and an elastic band to secure.

Make up 1 litre of strong green tea – 2 tea bags and 80g of sugar (just regular granulated sugar, none of the fancy ones). You can use any tea as long as it has tannins in it – that’s what you need to make the fermented tea and the bacteria feed off the sugar so by the time you are drinking it, most of the sugar will be gone.

Once the tea has cooled to tepid, remove the tea bags.

Decant the tea into your 500 ml jars, scobie, and starter. If you have 1 scobie, cut it in half and split it between the 2 jars along with half the starter in each jar. The starter should be about 50ml in each jar.

Cover the jar with the muslin cloth and secure it (to keep the flies out and the oxygen getting in). Place the jars somewhere where they are not in direct sunlight or a draughty area. Ideally, somewhere that has a fairly consistent temperature.

Depending on the temperature in your home will determine how long your fermentation will take. In warmer temperatures, around 4 days, cooler temperatures 5-7 days. The best way to check is to taste test. If it’s still sweet, it needs more time. If it’s like vinegar, it’s gone too far. You are looking for a sweet spot between the 2 – everyone’s taste buds are different. It needs to be what you like.

Once you have the right taste, decant 80% of the liquid into a bottle. This is where you can have fun adding flavour to your kombucha. Personally, I decant 80% of each jar into 1 bottle. You can do that or have 2 separate bottles.

To flavour your kombucha you can use things like:

Ginger, elderflower, mint, seabuckthorn, hawthorn berries, rose petals, fruit (berries are really nice), any of your herbal tea bag flavours. You can get really inventive and try out seasonal things you can forage.

Add whatever you want to flavour, leave overnight, then you are good to start drinking from the following day.

Remember, I am collaborating with The Little Foragers Kitchen on Sunday 13th Aug 4-7pm with a Woodland Yoga & Forage, book here: https://bookme.name/iamjenwils…

Super Lime Pickled Salad Sub

I hope you are well and enjoy these Saturday Kitchen posts… 

Eating is a joy… Which is not something I would have said 8 years ago. 

I had what I would now consider a lousy relationship with food for a long time. I would get stressed if I went somewhere for food and didn’t know what I would be given to eat or what was on the menu. 

I would rather not eat than try something I wasn’t sure about. 

I was fussy.

In 2003 I decided the safest thing for me was to be vegetarian. My now ex-husband loved food, was adventurous, and always tried to get me to try things… Stress levels and discomfort were through the roof… 

To reduce this stress, I declared I was a veggie. I figured that veggies were less risky and I could get my brave pants on trying new veg. 

And so, until 2022, I didn’t eat meat at all.   

This newfound love for food has come through therapy, getting quiet with my body to listen to what it’s telling me I need. 

In listening, I am trying out new things…

Subs are not something I eat often… but when I do, I make an epic sub! (If anyone can share why they are subs and not sandwiches, I would be interested to know – I am trying to stay focused and not get distracted googling things)

If you follow me on social media, you will see me share some of my creations. 

Super Lime Pickled Salad Sub      Fiber Points 15+

The Bread

Sourdough bread (ideally but if not, then your fave bread, keeping in mind fiber points, rye, wholegrain, and seeds give it a bonus. And, check the ingredients list for items you don’t recognise and avoid!)

The Filling

A protein source of your choice (chickpeas, lentils, chicken, turkey, beef, tofu, etc)

Salad leaves of your choice (a mix gives your more points)

Onion (I like red onion or shallots for this)

Mini Cucumbers

Saurkraut (if you make your own, add different flavours, herbs etc to boost your fiber points)

Carrot Kraut (shredded carrots as an alternative)

Lime or Apple Cider Vinegar

Extra Virgin Olive Oil

Garlic (optional)

Constructing Your Sub

Finely slice the onion and mini cucumber (I use the potato peeler for ease) and also the carrot if you don’t have carrot kraut), put them into a bowl, squeeze the juice of your lime or a tablespoon of vinegar over and drizzle a tablespoon of extra virgin olive oil over. Sit this to the side for the moment to let the pickling happen.

Crush a clove of garlic if you wish to use it and mix with a tablespoon of olive oil.

Open your bread and spread the garlic oil evenly (I do this instead of butter, but you could use butter if you prefer, but you don’t get fiber points for butter)

Get your salad leaves and start to build your bed of leaves

Add your kraut

Add your pickled salad

Add your protein

Add any other herbs or seeds you have

Et Voila your sub is built…. Enjoy!

Let me know what you put in yours.

Back To Top